Controlling the KY040 Encoder on ESP32 with Multi-core Processing

In this article, we will explore how to control the KY040 rotary encoder using an ESP32 microcontroller. We will use the dual-core capability of the ESP32 to update the encoder readings on one core while handling other tasks on the main core, ensuring maximum efficiency.
Components Required
Circuit Diagram

Code
Here’s a sample code that demonstrates how to read the KY040 encoder values using the second core of the ESP32.
// Rotary Encoder Module connections
const int ROTARY_ENCODER_A_PIN = 34; // PinCLK
const int ROTARY_ENCODER_B_PIN = 35; // PinDT
const int ROTARY_ENCODER_BUTTON_PIN = 15; // PinSW
volatile int encoderValue = 0;
int lastReportedValue = 1;
static int lastEncoderValue = 0;
// Variables to debounce Rotary Encoder
long TimeOfLastDebounce = 0;
const int DelayofDebounce = 2; // Reduced debounce delay in milliseconds
// Store previous Pins state
int PreviousCLK;
int PreviousDT;
void IRAM_ATTR handleEncoderChange() {
int currentCLK = digitalRead(ROTARY_ENCODER_A_PIN);
int currentDT = digitalRead(ROTARY_ENCODER_B_PIN);
if (PreviousCLK == 0 && currentCLK == 1) {
if (currentDT == 0) {
encoderValue++; // Clockwise
} else {
encoderValue--; // Counter-Clockwise
}
} else if (PreviousCLK == 1 && currentCLK == 0) {
if (currentDT == 1) {
encoderValue++; // Clockwise
} else {
encoderValue--; // Counter-Clockwise
}
}
PreviousCLK = currentCLK;
PreviousDT = currentDT;
}
void IRAM_ATTR handleButtonPress() {
unsigned long currentTime = millis();
if (currentTime - TimeOfLastDebounce > DelayofDebounce) {
TimeOfLastDebounce = currentTime;
Serial.println("Button Pressed!");
}
}
void setup() {
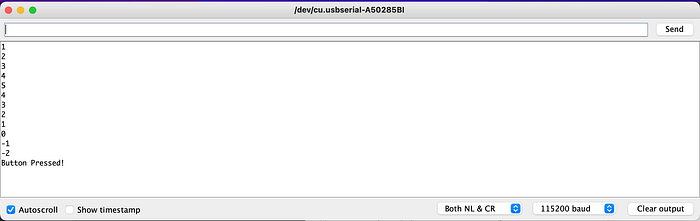
Serial.begin(115200);
pinMode(ROTARY_ENCODER_A_PIN, INPUT);
pinMode(ROTARY_ENCODER_B_PIN, INPUT);
pinMode(ROTARY_ENCODER_BUTTON_PIN, INPUT_PULLUP);
attachInterrupt(digitalPinToInterrupt(ROTARY_ENCODER_A_PIN), handleEncoderChange, CHANGE);
attachInterrupt(digitalPinToInterrupt(ROTARY_ENCODER_BUTTON_PIN), handleButtonPress, FALLING);
PreviousCLK = digitalRead(ROTARY_ENCODER_A_PIN);
PreviousDT = digitalRead(ROTARY_ENCODER_B_PIN);
xTaskCreatePinnedToCore(
readEncoderTask, // Function to implement the task
"readEncoderTask", // Name of the task
10000, // Stack size in words
NULL, // Task input parameter
1, // Priority of the task
NULL, // Task handle
0 // Core where the task should run
);
}
void loop() {
if (lastReportedValue != encoderValue) {
Serial.println(encoderValue);
lastReportedValue = encoderValue;
}
delay(10);
}
void readEncoderTask(void * pvParameters) {
for (;;) {
if (lastEncoderValue != encoderValue) {
// Handle encoder value changes
lastEncoderValue = encoderValue;
}
vTaskDelay(1 / portTICK_PERIOD_MS); // Delay for 1 ms
}
}Explanation
- Setup
- We initialize the serial communication and configure the pins for the KY040 rotary encoder.
- We attach interrupts to the CLK and button pins of the encoder to handle the changes.
2. Interrupt Service Routines (ISR)
- ‘handleEncoderChange()’: This ISR is triggered whenever there is a change in the CLK pin. It reads the state of the DT pin to determine the direction of rotation and updates the encoder value accordingly
- ‘handleButtonPress()’: This ISR is triggered whenever the button is pressed. It includes debouncing logic to ensure reliable detection.
3. Dual-core Task
- We create a separate task ‘readEncoderTask()’ that runs on the second core of the ESP32. This task continuously monitors the encoder value and handles any changes.
- By running this task on the second core, we offload the processing from the main loop, ensuring that other tasks can run efficiently without being interrupted by the encoder handling.
4. Main Loop
- In the main loop, we simply check if the encoder value has changed and print the updated value.
After uploading the code, you need to open the serial monitor and change the baud rate to 115200.
Then when you rotate the encoder, you will see smooth measurement throughout.
Conclusion
Using the dual-core capability of the ESP32 allows us to handle rotary encoder inputs efficiently.
This approach ensures that the main application remains responsive while processing the encoder inputs on a separate core.
By following this guide, you can achieve high-efficiency control of the KY040 rotary encoder in your ESP32 projects.
Contact us for any consultations or projects related to IoT
Email: udara@protonest.co
Protonest for more details.
Protonest specializes in transforming IoT ideas into reality. We offer prototyping services from concept to completion. Our commitment ensures that your visionary IoT concepts become tangible, innovative, and advanced prototypes.
Our Website: https://www.protonest.co/
If you enjoyed this article and would like to show some support, consider buying me a coffee on Ko-Fi.
Your support not only helps me keep creating content like this but also fuels me! ☕️📚
Thank you for being an amazing reader!
Here’s my Ko-Fi link: https://ko-fi.com/udarakumarasena
Cheers!
